How to Clean Garden Pruning Shears: A Simple Guide

If you’re a gardener, you know how vital sharp pruning shears are. But did you know keeping your garden pruning shears clean is just as crucial? With years of gardening experience, I’ve discovered that unclean shears not only contribute to the spread of plant diseases but also deteriorate more rapidly. That’s why I put together this simple guide. I’ll show you exactly how to clean garden pruning shears, step-by-step, so they stay sharp and last longer.
Dirty tools can impact the health of your plants and reduce their yield over time. Regular maintenance not only extends the lifespan of your tools but also ensures precision in every cut. With just a little care, you can protect your plants and invest in a thriving, productive garden.
Let’s make sure your tools are in top shape for healthy, happy plants!
Why Clean Garden Pruning Shears?
Well, it’s not just about making pretty cuts. Clean shears ensure smooth, precise cuts that promote faster healing for your plants. When plants heal quickly, they’re less vulnerable to pests and diseases. In contrast, dull or dirty shears can create jagged cuts that stress the plant and make it harder to recover.
What is “Cleaning”? Cleaning means removing dirt, sap, and plant debris from the blades of your shears. Sap, a sticky fluid from plants, can harden over time and interfere with the sharpness and movement of the blades. This reduces their efficiency and longevity.
Dirty shears, on the other hand, are like tiny germ carriers. They can harbor bacteria (microscopic organisms that may cause infections) and fungi (spore-producing organisms that can spread diseases). These harmful agents can transfer from one plant to another with every snip, spreading infections that can harm or even kill your plants.
“Sharpening” for Clean Cuts: Beyond cleaning, sharpening the blades regularly is another essential step. Sharp blades make clean, effortless cuts, reducing strain on your hands and minimizing damage to plants. Dull blades crush stems instead of cutting cleanly, further increasing the risk of infection.
Regular cleaning also helps prevent rust, which occurs when metal reacts with moisture in the air. Rust not only weakens the blades but can also leave residues that harm plants. By cleaning your shears after each use, you’re protecting both your tools and your garden.
Trust me, keeping them clean is a simple way to maintain a healthy, thriving garden. A little effort in cleaning and maintenance can go a long way in ensuring your tools last and your plants stay happy!
Materials You Need
To get your garden pruning shears clean and working like new, you’ll need a few basic things. Don’t worry, you probably already have most of them at home. Over many years of garden tool maintenance, I’ve found these items to be the most effective:
Warm, soapy water
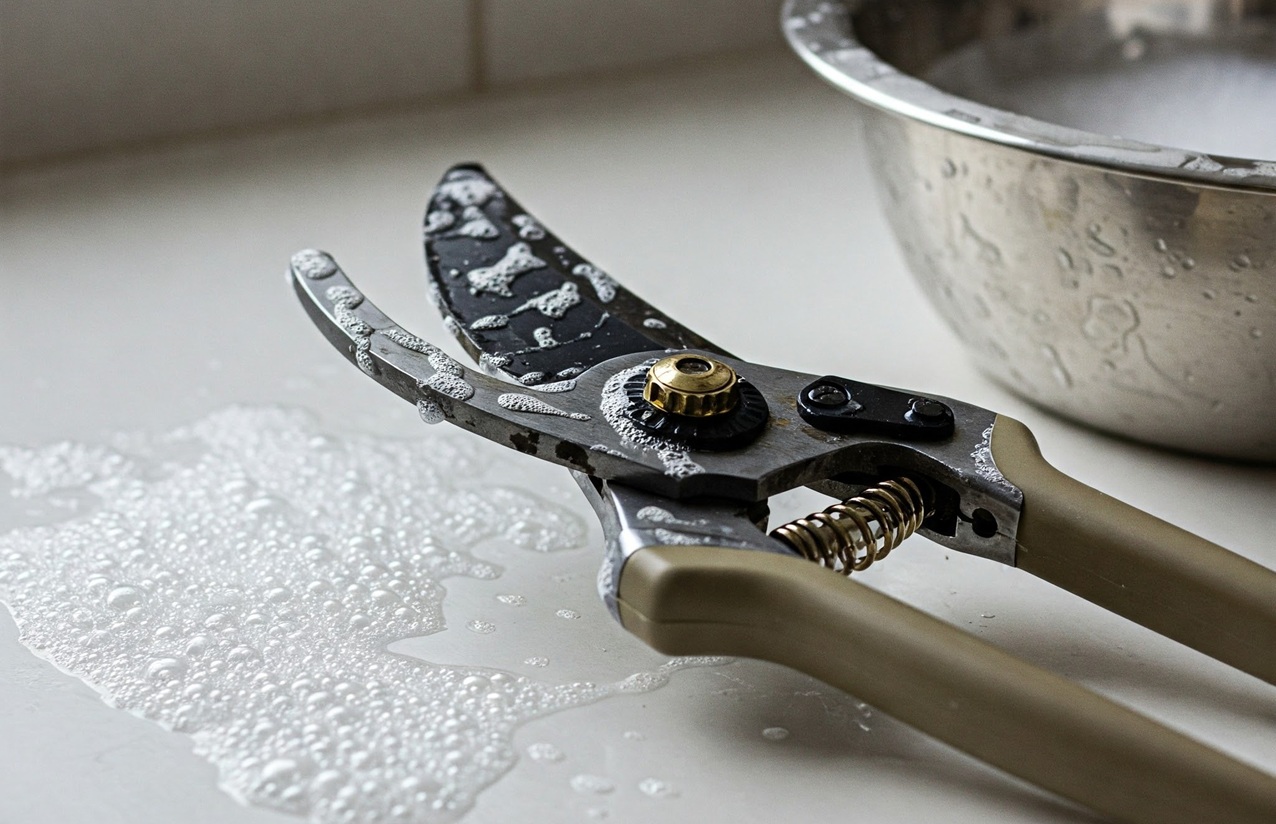
Warm, soapy water might sound basic, but it’s a gardener’s best friend! Think of it as the superhero sidekick for your pruning shears. Dirt and sticky sap love to cling to the blades, making them less effective. But with just some warm water and a little soap, you can wash away all that grime in no time.
Why warm? The heat helps soften the sap and loosen stubborn dirt. Why soapy? Soap breaks down that sticky residue like magic! A quick scrub with this simple combo not only cleans your tools but also keeps them sharp and ready for action. It’s the easiest step to keeping your shears—and your garden—happy and healthy!
Creating your own warm, soapy water mix is incredibly simple and effective! Here’s how you can whip it up:
- Grab a bucket or bowl: Pick a container large enough to fit your pruning shears comfortably.
- Add warm water: Fill the container with warm (not boiling) water. The warmth helps break down sticky sap and loosen dirt.
- Mix in a mild soap: A small squirt of dish soap will do the trick—just enough to make the water sudsy. Avoid harsh chemicals, as they might damage the blades.
Give it a good stir, and voilà! You’ve got your cleaning solution ready to tackle dirt and grime. After soaking your shears for a few minutes, scrub gently with a soft brush or cloth, rinse with clean water, and dry them thoroughly to prevent rust. Your shears will thank you for the spa treatment!
- Rubbing alcohol (or a diluted bleach solution): This helps kill any nasty bacteria or fungi that could harm your plants. I use these products regularly, to prevent disease spread in my own garden.
- A wire brush or an old toothbrush: These are perfect for scrubbing away stubborn debris.
- Sandpaper or a sharpening stone: If your shears are dull, these will help you get that sharp edge back.
- A clean cloth: For wiping things down and drying your shears.
- Lubricating oil (like mineral oil): This keeps the moving parts smooth and prevents rust. I have found mineral oil to be superior to products like WD-40, for long-term tool care.
Step-by-Step Cleaning Process
Alright, let’s get those garden pruning shears clean! Here’s how I do it, step-by-step, based on years of keeping my tools in top shape:
- Remove Debris: First, grab your wire brush or that old toothbrush. Give the blades a good scrub to get rid of any loose dirt and sticky sap. This is the foundation of a good clean.
- Soak in Soapy Water: Next, fill a container with warm, soapy water and let your shears soak for a few minutes. This loosens up any stubborn gunk that’s stuck on there.
- Scrub the Blades: Now, with the brush, really get in there and scrub those blades. Make sure you get all the nooks and crannies.
- Disinfect: This is important! Dip the blades in rubbing alcohol or a diluted bleach solution. This kills any bacteria or fungi that could harm your plants. Let them air dry completely. I’ve seen first hand how this step prevents disease spread.
- Sharpen the Blades: If your shears are dull, now’s the time to sharpen them. Use sandpaper or a sharpening stone, following the blade’s original angle. It makes a huge difference in how smoothly they cut.
- Lubricate: Put a few drops of lubricating oil (like mineral oil) on the pivot points—the moving parts. This keeps them working smoothly and prevents rust. I do this regularly, and it really extends the tool’s lifespan.
- Wipe Clean: Finally, use a clean cloth to wipe away any extra oil and make sure your shears are completely dry. This prevents any dirt from sticking to them.”
Maintaining Your Pruning Shears
Keeping your garden pruning shears clean isn’t a one-time thing. It’s about building good habits. Here’s what I’ve learned over years of gardening about how to keep them in top shape:
- Regular Cleaning: I make it a point to clean my shears after every use. Even a quick wipe-down helps prevent sap and dirt from building up. This small habit makes a big difference.
- Proper Storage: Moisture is the enemy of metal. Always store your shears in a dry place. I have a designated spot in my shed, away from dampness, to prevent rust.
- Routine Sharpening: Just like a kitchen knife, pruning shears need regular sharpening. I check the blades often and sharpen them as needed. Sharp blades mean cleaner cuts and healthier plants. I’ve found that keeping a sharpening stone handy makes this task easier.
Frequently Asked Questions (FAQs)
Q: How often should I clean my garden shears?
A: It’s best to clean your garden shears after each use to prevent the buildup of sap and other debris.
Q: Can I use WD-40 to lubricate my garden shears?
A: While WD-40 can be used as a temporary lubricant, it’s not ideal for long-term use. Mineral oil is a better choice for lubricating garden shears.
Q: How do I sharpen my garden shears?
A: You can sharpen your garden shears using a sharpening stone or a file. Be sure to follow the manufacturer’s instructions for sharpening.
Conclusion
By following these simple steps, you can keep your garden pruning shears in top condition.
Regular cleaning not only ensures better performance but also prolongs the life of your tools.
Amazon Affiliate Product Recommendations:
- Fiskars Bypass Pruning Shears
- Hewog 8.5″ Professional Pruning Shears
- gonicc 8″ Professional Premium Titanium Bypass Pruning Shears
- Premium Bypass Pruning Shears
Best Garden Shears for Pruning: Top 5 Picks

I’m John Doe, a Certified Master Gardener with over 20 years of hands-on experience in cultivating healthy and vibrant gardens. My expertise spans organic gardening, soil science, and sustainable pest control. I’ve worked extensively with community gardens and have a deep passion for sharing my knowledge to help others succeed in their gardening endeavors.


